How a photo mosaic wall works
The idea is simple: every photo taken at the booth becomes one small cell of a much larger image. From a distance, guests see the client’s logo or the event artwork; up close, they recognize the faces. It is an activity that gets everyone involved, including guests who never dance.

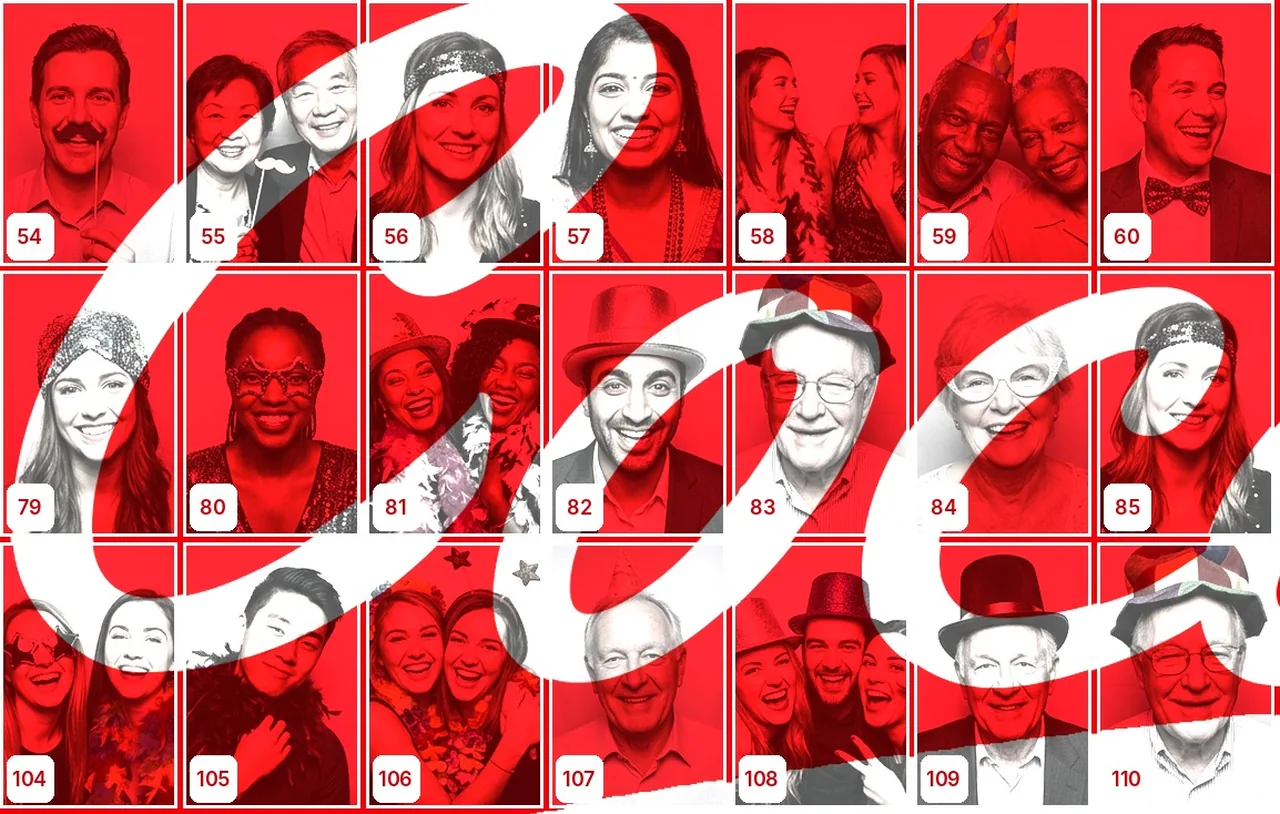
- The operator uploads the target image in the dashboard and sets the board size.
- Froozbooth splits it into a grid of cells and calculates the average color of each one.
- For every session, the booth assigns a free cell, and the photo gets that position’s filter.
- The guest sticks the sticker on the cell shown on screen; the wall fills up during the night.
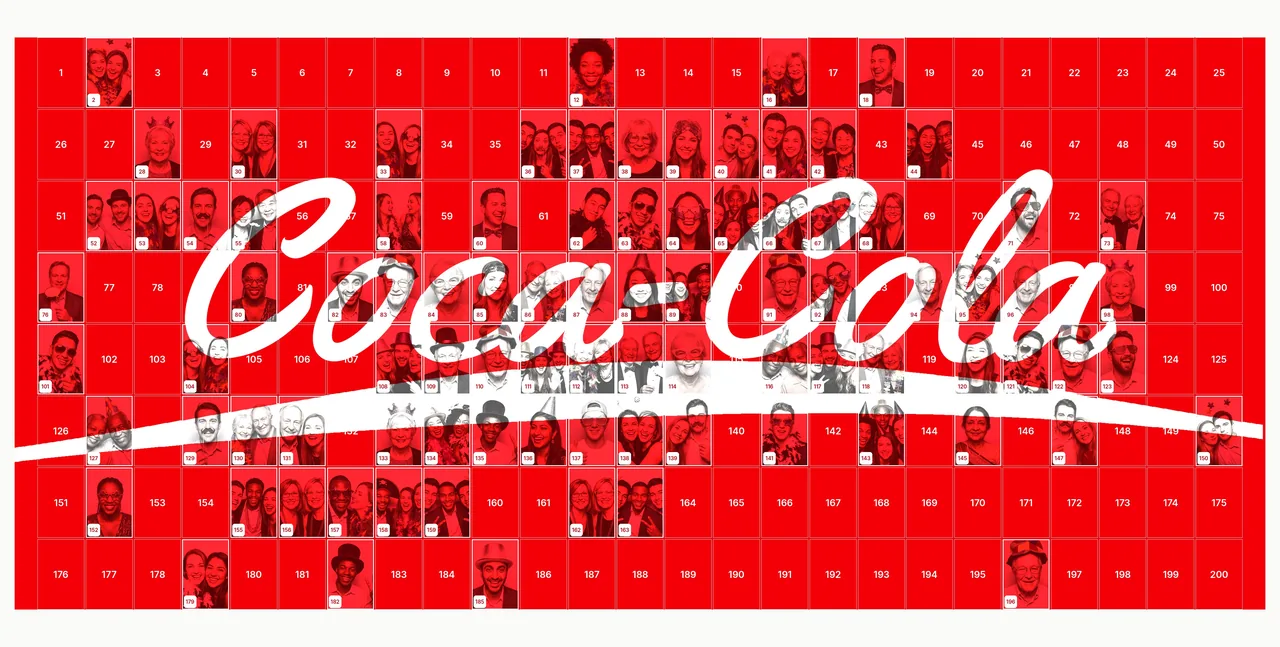
V1 is a physical wall: no extra screen, no real-time sync, no dependency on the venue’s Wi-Fi. A live mode, with the mosaic shown on a screen, is planned for a later release and will reuse the same grid.
Two prints per session: the souvenir and the sticker
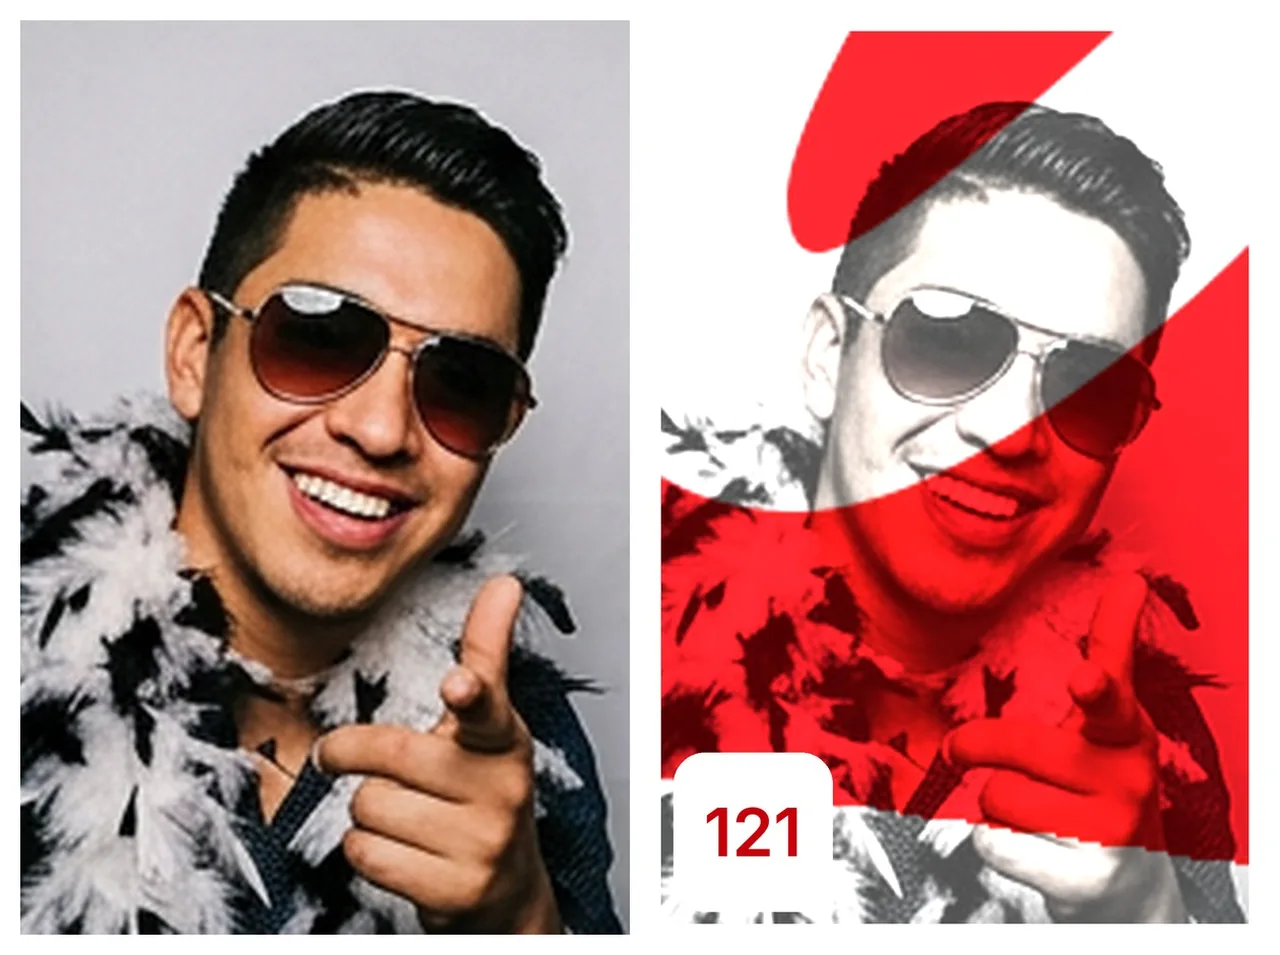
The wall sticker is not a normal print: it is small, numbered and meant to be stuck on a board, not kept in a bag. Froozbooth therefore sends it as a separate print job. The souvenir keeps the event template, with its frame, names and logo; the sticker carries the cropped photo, tinted in the cell color, and its number.
| For whom | What it contains | |
|---|---|---|
| Souvenir | The guest | The event template, as a 10 × 15 print or a strip |
| Wall sticker | The board | The cropped photo, the cell number and cut marks |
On the share screen, the guest chooses “For the mosaic” or “For me”. The souvenir stays available even if the sticker fails. A reprinted sticker reuses the same cell, so the wall never ends up with two photos on top of each other.
Choosing the grid size
Operators rarely know both sides at once: they either have a board and stickers, or an idea of how many photos wide the wall should be. The dashboard therefore offers two modes, and both show the real number of cells and the sticker size.
| You start from… | What you enter | What Froozbooth calculates |
|---|---|---|
| Your hardware | Board, margins, sticker format, gap | Columns, rows and number of cells |
| Your layout | Number of columns and rows | Real sticker size and matching paper |
Example: a 2,000 × 1,000 mm board, a 100 mm margin, 70 mm stickers and a 3 mm gap give 24 columns × 11 rows, or 264 cells. In “number of cells” mode, 24 × 11 on the same board gives stickers of roughly 72 × 70 mm. The grid is always centered in the image area.
If the calculated stickers are larger than a 10 × 15 sheet, the dashboard warns you before the event: better to reduce the number of cells than to discover the problem on the first print. Choosing a photo booth printer
The target image and the placement guide
The client provides the target image: a logo, brand artwork or a photo of the couple. It must stay readable at the resolution of the grid. A simple logo with large shapes and little fine text survives 24 × 11 cells far better than a detailed wordmark.
- 1:1 placement guide: the full grid at board scale, printed on dibond, PVC or matte vinyl.
- A4/A3 plan: the same grid, reduced, for the host and the client.
- Test page: a 100 mm ruler and the exact footprint of one sticker, to check the printer.
- Target artwork as JPEG: to approve the result with the client before printing the board.
Guide opacity is adjustable, 25 % by default. At 0 %, the board stays white: guests stick their stickers blind, and the reveal is complete at the end of the night. At 100 %, the image is printed at full strength under the grid and acts as a permanent guide.
What the guest sees at the booth
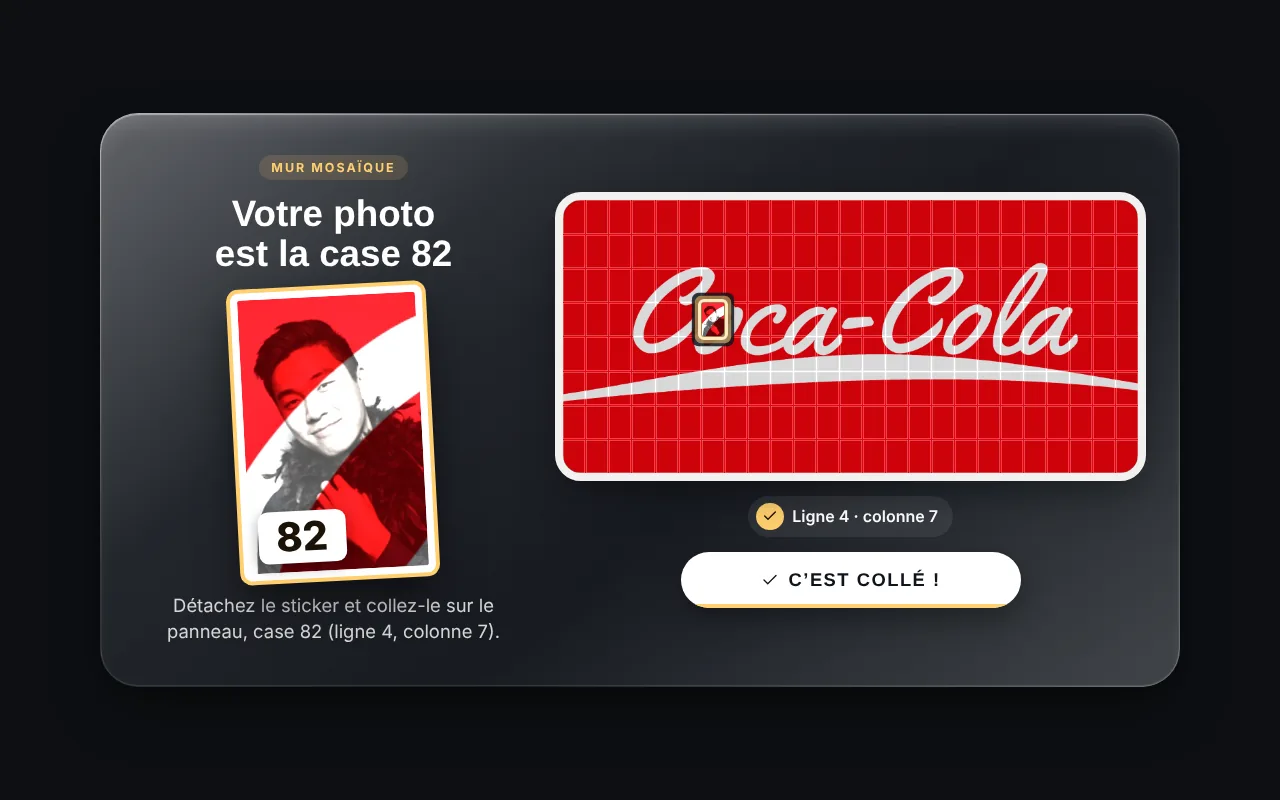
After the photo, the share screen shows two separate buttons: “For the mosaic” and “For me”. The first prints the sticker and displays the cell; the second prints the souvenir. The guest can do both, in any order.
- The sticker comes out with its cell number printed on it and below it.
- The screen shows the number large, the row and column, and a mini plan of the wall.
- The cell is outlined on the plan: the information does not rely on color alone.
- The guide closes by itself after a few seconds, or on touch.
- No network is needed: the cell palette travels inside the event configuration.
Board, stickers and logistics
| Item | Supplied by | What to plan |
|---|---|---|
| Rigid board | The operator | Dibond or PVC, with 20 mm bleed |
| Placement guide | Froozbooth | Print at 100 %, 300 DPI, matte material |
| Stickers | The operator | 10 × 15 adhesive paper, one per photo |
| Target image | The client | High-resolution logo, simple background |
The specification also allows the fallback “classic print + double-sided tape”: the operator does not need special paper to try the activity. A printed sticker is cleaner and faster to stick, but it is not mandatory for a first event.
Included in the Pro plan, with no credits
The mosaic wall is included in the Pro plan, with no cell cap and no credits to buy. It does not consume AI credits: all color and assignment work happens on the booth. The only costs are physical: the board, the sticker paper and ink.
It is a simple selling point for the operator: an activity that turns the night’s photos into a collective object, with no extra subscription and no second app to install. Froozbooth pricing and plans
Event-day checklist
- Ask the client for a high-resolution logo, ideally SVG or transparent PNG.
- Print the test page and check the 100 mm ruler before production.
- Have the 1:1 guide printed on a rigid material, without page fitting.
- Test a full sticker on the booth printer, then stick it and peel it off.
- Stock enough adhesive paper: one sheet per photo, plus a few tests.
- Mention the mosaic wall in the event’s consent text.
- Keep a roll of double-sided tape as a backup if sticker paper runs out.
- Check the lighting on the board: a wall in the dark cannot be read from the dance floor.
Frequently asked questions
What is a photo mosaic wall?
It is a board on which guests each stick a numbered sticker. Put together, the stickers form a large image: the client’s logo, a photo of the couple or the event artwork. The booth prints the sticker and tells each guest which cell to use.
Do I need an extra screen or app besides the booth?
No. V1 works with the booth and a physical board. A live mode, with a screen showing the mosaic in real time, is planned for a later release.
How many photos does it take to fill the mosaic?
It depends on the grid. A 2,000 × 1,000 mm board with 70 mm stickers gives 264 cells. The dashboard shows the exact number and warns you if the guest estimate is far from the number of cells.
Can I choose the number of columns and rows?
Yes. The dashboard offers two modes: by dimensions (board, sticker, gap) or by number of cells (columns and rows). In the second, Froozbooth calculates the real sticker size and the matching paper.
Which sticker format should I choose?
By default, the format of the guest prints, often 10 × 15. The operator can choose 5 × 5, 7 × 7, 10 × 10 or 10 × 15 cm. A sticker too large for the sheet is flagged in the dashboard before the event.
What happens if the printer fails?
The souvenir print remains available. The cell is reserved before printing and is not released by a failure, so the next sticker will not take the same place. A reprint reuses the existing cell.
Can guests send photos from their phones?
No, on purpose. Cells come only from booth sessions: the photo color is read locally, and the wall stays consistent with the event.
Is the mosaic wall included in the Pro plan?
Yes, with no cell cap and no credits. The remaining costs are physical: the board supplied by the operator, the adhesive paper and ink.
Can the target image be changed during the event?
The dashboard lets you replace it before the start. After that, cells already assigned do not change: new photos follow the new image, while earlier ones keep their place.
How does the logo stay readable?
Each sticker gets a tint in its cell color, and the number is printed in a contrasting badge. A simple logo with large shapes and little fine text reads better than a detailed wordmark.